Structure trees
You spend a shared balance of structure upgrade points across 6 trees, choosing between higher building tiers and additional build items. You begin with 2 structure trees unlocked, so spending points in other trees leaves your starter walls and miners available.
How it works
Section titled “How it works”Each selection spends 1 structure point without charging resources. Placement still charges the build cost. The Choose next upgrade list offers an item only when you have a point, meet its level requirement and have its preceding tier, if any.
A higher tier replaces the preceding build item in your hotbar and, if equipped, in your hand. Placed structures keep their tier. Your 32-wall allowance, for example, counts your walls across every tier. These building limits count each player’s placements separately. Spending a point does not free a place or change an existing structure.
| Structure point levels | 3, 4, 6, 8, 10, 12, 13, 15, 16, 17, 18, 19 |
|---|---|
| Total structure points | 12 |
You start with the 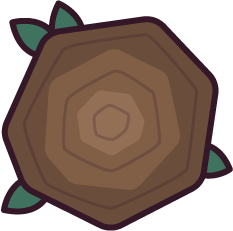 Wooden Wall. The next tiers,
the
Wooden Wall. The next tiers,
the 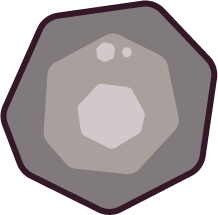 Stone Wall and
 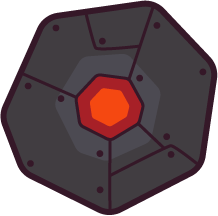 Reinforced Stone Wall, replace it in sequence,
taking 2 points to finish the tree.
Reinforced Stone Wall, replace it in sequence,
taking 2 points to finish the tree.
- Wooden WallStart
- Stone WallLv 3
| Wall | Placement cost | Health |
|---|---|---|
| Wooden Wall |  50 wood 50 wood |
350 |
| Stone Wall | 50 wood,  100 stone 100 stone |
700 |
| Reinforced Stone Wall |  100 gold, 50 wood, 100 stone 100 gold, 50 wood, 100 stone |
1400 |
Miners
Section titled “Miners”You also start with the  Wooden Miner. The next tiers,
the
Wooden Miner. The next tiers,
the  Stone Miner and
  Reinforced Stone Miner, replace it in sequence.
Miners produce gold while you are alive. The table shows their base production without a gold mine
bonus; see Miners for placement bonuses.
Reinforced Stone Miner, replace it in sequence.
Miners produce gold while you are alive. The table shows their base production without a gold mine
bonus; see Miners for placement bonuses.
- Wooden MinerStart
- Stone MinerLv 4
| Miner | Placement cost | Base gold per second |
|---|---|---|
| Wooden Miner | 10 wood |
2 gold |
| Stone Miner | 10 wood, 20 stone |
4 gold |
| Reinforced Stone Miner | 100 gold, 20 wood, 40 stone |
5 gold |
Spikes
Section titled “Spikes”There is no starter spike. You unlock the  Wooden Spike, then
the
Wooden Spike, then
the  Stone Spike, then the
  Reinforced Stone Spike, spending
3 points to finish. You cannot skip a tier by saving points until its level
requirement is met; each selection requires the preceding spike build item.
Reinforced Stone Spike, spending
3 points to finish. You cannot skip a tier by saving points until its level
requirement is met; each selection requires the preceding spike build item.
- Wooden SpikeLv 3
- Stone SpikeLv 6
| Structure | Health | Cost | Limit | Base destroy reward |
|---|---|---|---|---|
| Wooden Spike | 120 | 20 wood | 16 | 10 wood, 10 experience |
| Stone Spike | 200 | 20 wood, 50 stone | 16 | 10 wood, 25 stone, 20 experience |
| Reinforced Stone Spike | 300 | 100 gold, 60 wood, 120 stone | 16 | 50 gold, 30 wood, 60 stone, 40 experience |
Turrets
Section titled “Turrets”There is no starter turret. The  Wooden Turret leads to
the
Wooden Turret leads to
the  Stone Turret and
  Reinforced Stone Turret.
- Wooden TurretLv 4
- Stone TurretLv 6
| Structure | Health | Cost | Limit | Base destroy reward |
|---|---|---|---|---|
| Wooden Turret | 60 | 50 wood | 4 | 25 wood, 10 experience |
| Stone Turret | 120 | 50 wood, 100 stone | 4 | 25 wood, 50 stone, 20 experience |
| Reinforced Stone Turret | 180 | 100 gold, 100 wood, 200 stone | 4 | 50 gold, 50 wood, 100 stone, 40 experience |
You can choose only 1 of the 4 alternatives. The options are
the  Repair Pad,
  Health Pad,
the
Health Pad,
the  TNT or
  Landmine. Selecting any of them removes
every other pad-tree choice for that life. More points do not let you add another choice or switch
the selected build item; respawn resets the selection.
Landmine. Selecting any of them removes
every other pad-tree choice for that life. More points do not let you add another choice or switch
the selected build item; respawn resets the selection.
- Repair PadLv 8
- Health PadLv 8
- TNTLv 8
- LandmineLv 8
| Structure | Placement cost | Active limit |
|---|---|---|
| Repair Pad | 30 wood |
4 |
| Health Pad | 30 wood |
4 |
| TNT | 400 gold, 250 wood, 250 stone |
3 |
| Landmine | 100 gold |
12 |
You can choose only 1 of the 3 alternatives. The options
are the  Anti Structure Pad,
  Speed Boost
or
Speed Boost
or  Honeycomb. Choosing Honeycomb still rules out the pads in this tree
for that life, while leaving your pad-tree choice available.
Honeycomb. Choosing Honeycomb still rules out the pads in this tree
for that life, while leaving your pad-tree choice available.
- Anti Structure PadLv 4
- Speed BoostLv 4
- HoneycombLv 4
| Structure | Placement cost | Active limit |
|---|---|---|
| Anti Structure Pad | 40 wood |
2 |
| Speed Boost | 30 wood, 30 stone |
16 |
| Honeycomb | 30 wood |
8 |
- Compare placement costs before unlocking a build item. A wall or miner upgrade removes the cheaper tier from your hotbar, even when you cannot afford to place its replacement.
- Keep lower-tier structures until you need their places. An upgrade leaves them intact, and destroying a structure frees its place for the higher tier; upgrading alone frees no places.